Showing posts with label close to my heart. Show all posts

Wednesday, February 1, 2017

Damask Divas Hello Lovely Paper February 2017 Blog Hop

If you came from Jen's Messy Studio, you are in the right place.  If you have jumped here and just discovered our blog hop, feel free to check the list at Damask Divas blog to find the complete list of blog hop participants.
This month's featured paper is Hello Lovely (Item X7216B).  This paper is gorgeous with great variety in complementing patters and colors.  I love it.  I decided to use this paper to make a cute little bunting of love notes to my boys.  


I had seen several people on Pinterest turn hearts into envelopes.  I thought this was super cute and that my boys would get a kick out of it.  The Hello Lovely Paper Packet is beautiful enough to display so I did!  

Supplies you need include:  
Hello Lovely Paper Packet (Item X7216B)
Blush Shimmer Trim (Item Z3313
Non-Stick Micro-tip Scissors (Item Z1836)
Bone Folder (Item Z1204)

I used my Cricut to make a cut file for the hearts with score lines.  However, you certainly do not need a Cricut.  You can simply cut hearts out and fold and press with the bone folder for a smooth edge.


I cut two per page so that I could have one of each patterned paper (the papers are double sided with a different print on each side).


I ended up with a pile of cut and scored hearts.


I then took the bone folder and folded the hearts as follows:


Easy, right???  I then cut a length of Blush Shimmer Trim (Item Z3313), tied the ends up, and hung the envelopes on the ribbon.  


No glue, no fuss.  Just beautiful love notes on hearts!  If you are interested in this project and maybe even embellishing with more paper, stickers, or bling, you may be interested in saving money with the Hello Lovely Workshops Your Way (Item G1119) which comes with two sets of this patterned paper, white cardstock, the Blush Shimmer Trim, gold glitter gems, and coordinating stickers for $26.95.  You can also make scrapbook pages (free instructions available), Everyday Life quick scrapbooking, and cards if you love this paper and want more options.  

Well, you made it to the end of this month's hop.  We hope you had as much fun browsing our creations as we had making them! Thanks so much for hopping with us--now go get your crafty on!

Monday, March 31, 2014

Ariana Notebook

If you came from Legacy of the Heart blog, you are in the right place.  If you have jumped here and just discovered our blog hop, feel free to check the list at Damask Divas blog to find the complete list of blog hop participants.


I wanted a notebook to have with me for taking notes and planning for my Close To My Heart workshops and projects.  I also wanted to make the neighbor kids a 'good luck at school' gift since they recently went from home schooling to public school.  A boring composition book and pen just were not going to do.  My project then became a paper covered composition book using the Ariana paper packet, some vinyl, ribbon, and the Close To My Heart Cricut collections.  Here is what I did, based on an Oh My Crafts blog project from August 2011.


Supplies from Close To My Heart:  Ariana B&T Duos Paper Packet (X7179B)
White Daisy Cardstock (1385)
Cricut Artbooking Collection (Z1906)
Cricut Art Philosophy Collection (Z1686)
(not pictured but recomended) Outdoor Denim Chevron Ribbon (Z1808)
(or Jute Ribbon Z1867, or Ruby Chevron Ribbon Z1846)
Bonding Memories Glue (1512)
(optional) Tombow Adhesive (1514)
Corner Rounder (Z1912)
Euro Personal Paper Trimmer (Z338) or Supercut Deluxe Craft Paper Trimmer (Z1783)


You will also use: a composition notebook
hot glue gun
pen or pencil
vinyl (in a coordinating color, pictured is tan but I used grey and brown)


Directions:  
  • Cut (2) Ariana B&T Duos Paper to 6 3/4" by 9 3/4" or to the size of the front and back covers of your notebook.  Round two corners on the same side of each page with the Corner Rounder.
  • Cut (1) piece of Ariana B&T Duos Paper to 1 1/2" by 6 3/4" 
I simply used the reverse side of the floral print which already coordinated perfectly.  For the boys, I used the Ariana grey with the reverse side of the floral paper.
  • Cut (1) piece of vinyl to 4 3/4" by 6 3/4"
  • Cut the vinyl using the Cricut Artbooking cartridge.  
To do this, place your vinyl lined up on the bottom left of the cutting mat (longer side vertical).  Move the blade to the top right corner of the vinyl, at 1 1/4" by 5 1/4" and press 'set cut area'.  For the 'CTMH' and 'Rhianna' books, I used the chevron overlay by putting the positive / normal image on one and the negative space on the other (no waste here!).  I cut using 'overlay' and 'fit to page' options, then 'shift' and '7'.  For the 'Grant' book, I used 'overlay' then 'shift' and 'G' at 11".
  • Cut your letters in the same vinyl.  I cut the 'CTMH' with Cricut Artbooking cartridge at 1" and 'Rhianna' with the same cartridge at 3/4".  'Grant' was cut with the Art Philosophy cartridge, because it was less girly, at 3/4"
  • Cut the White Daisy Cardstock to 2 1/2" by 4".  Round all four corners with the Corner Rounder.
  • Place the letters you cut on the White Daisy Cardstock
  • Cut two strips of coordinating ribbon to 6".  Adhere these to the front and back of the book using a hot glue gun and leaving enough room for a pen / pencil.  Make sure you have room to fit a larger pen so you aren't stuck with a smaller cheap one only.
  • Use the Bonding Memories Glue to adhere the largest pieces of paper to the front and back of your notebook, being careful to line up your top and right edges perfectly.  The bottom is better to trim if you need to.
  • Peel and stick your vinyl background on, then add your coordinating piece then white label with the Tombow Adhesive.
  • To add the border around the vinyl as I have done for the chevron and floral books, cut the zip strips off of your Ariana B&T Duos paper.  For the positive chevron image you will cut those into (2) 4 6/16" and (2) 6" pieces then adhere with Tombow Adhesive.  The negative chevron zip strip border was cut (2) 3" and (2) 6 3/4"
  • Stick your pen / pencil in the ribbon and you are set to tote a beautiful notebook with you everywhere
  • Optional finish: use contact paper over the front and back of your book to protect it from damage as you take your notebook in and out of bags.  Just leave the ribbon area open for that pen / pencil holder.


Thanks so much for stopping by and checking out my project!  Please leave some love in the comments below. Now off to The Gypsy Chic blog to see what she has done with the Ariana paper.  I hope you have a great time on our hop and checking out all the creations using Ariana paper packet. If you get lost, just hop on over to Damask Divas Ariana Blog Hop list.

Tuesday, March 4, 2014

Skylark Scrapbooking Workshop On The Go

I made my samples for my upcoming Skylark Work Shop On The Go (G1072).  What do you think? 


I even made a beautiful 6"x6" card with some of paper I had leftover.  I used the Background Bar pattern on page 75 of the Originals Card Confidence Program book (9036).


Below is the flyer for the Skylark Scrapbooking Workshop On The Go (G1072).  Please note that I edited this flyer to reflect my APO location pricing with shipping, etc.  It is almost twice as much to ship to an APO (though the post office charges the same as if shipping stateside. Don't ask me why the price is so much more because it certainly wasn't my decision!).


If you are in the United States and want to make your own beautiful Skylark Scrapbooking Workshop On The Go (G1072) you can click on the item number (G1072) and purchase from my Close To My Heart web page.  You can then find the instructions for the additional layout on my web page here.

The additional supplies you may already have but may need to order to complete the two double page layouts:
      • Z2118     Desert Sand Exclusive Inks Pad
      • Z2173     Slate Exclusive Inks Pad
      • Z1294     Sanding Kit
      • Z1151     3-D Foam Tape
      • Y1000     1"x1" My Acrylix Block
      • Y1006     3"x3" My Acrylix Block
      • Y1010     2"x6 1/2" My Acrylix Block

Happy Scrapapering!!!

Sunday, March 2, 2014

Hostess Exclusives

Here are the 2014 Spring and Summer exclusive Hostess Rewards!

Hostess Collection One

Hostess Collection Two

Hostess Collection Three

Unicorn Dreams Stamp Set

Enjoy the Little Things Stamp Set

Doodle Signs Stamp Set 
Some Bunny Stamp Set

A Mother's Love Stamp Set

My Hero Stamp Set

This is Good Stamp Set
The Hostess Collections One, Two, and Three are available as half off items (each at over $40 in savings).  These Hostess Rewards Stamp Sets are available at a discounted price so that you can make your select product credit stretch even further.  These Collections and Stamp Sets are only good through July so book your online or home gathering with me today, click here for more on being a hostess.

Sunday, February 23, 2014

Base and Bling

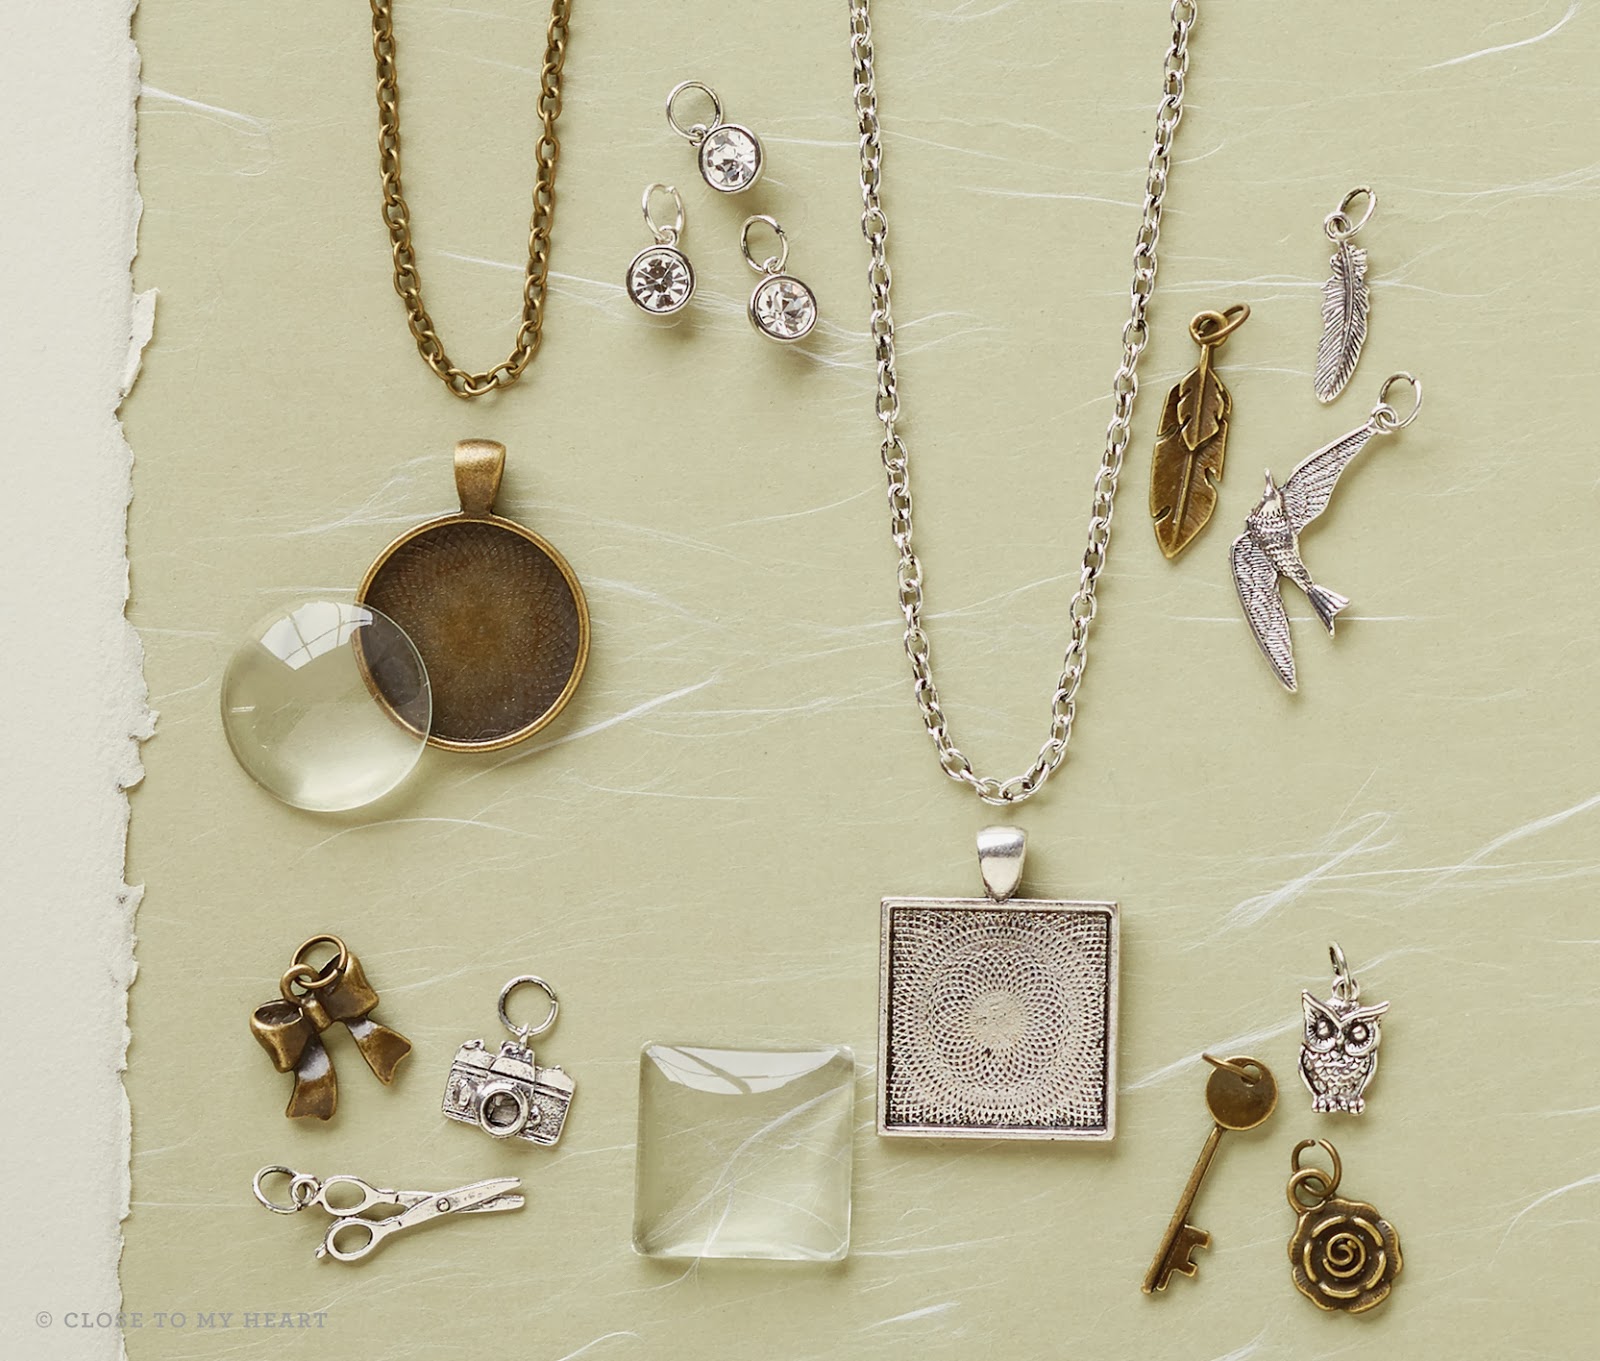
These Base & Bling options are so cool.  Now making your own unique jewelry and hair accessories is easy, beautiful, and AFFORDABLE!
 Base & Bling

 Base & Bling

 Base & Bling

 Base & Bling

 Base & Bling
To see all of the combinations and options available to make your very own Base & Bling, visit my website at www.scrapapered.ctmh.com.

Want to see how easy and fast it can be to make a necklace?  Watch this video!  Base & Bling Style
See more of the options available when you watch this video, Base & Bling: Wear Your Creativity

Thursday, February 13, 2014

Embossing is Boss in February 2014


During the month of February, you qualify to receive a free embossing folder for every 2 packs of bulk cardstock (single color or combo) you purchase! That is a savings of $8.95! Select from 5 new embossing folder designs—dot, chevron, quatrefoil, damask, or stripe—when you submit a qualifying order.

Contact me for more details.

*Offer valid February 1–28, 2014. Paper Fundamentals, Colonial White, White Daisy, and kraft cardstock packs do not count toward the qualifying purchase. No tax will be charged on the free item(s). Shipping/handling is calculated based on the full retail price ($8.95) of the free item(s).


Monday, February 10, 2014

Valentine's Day Kids Craft / Card

Today was a snow day, so no half day preschool. It was the kick in the butt I needed to get the kid's Valentine's Day "cards" made and ready to mail back to grandparents in the States.

I was inspired by a Pinterest post (of course), http://tonsoffunpreschoolactivities.blogspot.com/2011/02/long-distance-hug.html. The saying on the back of the hand I found at another preschool website that had lots of cute Valentine's Day activity ideas, http://www.everythingpreschool.com/themes/valentines/art.htm.

What I used:

White Poster Board
Red Finger Paint
Paint Brush
Scissors
Red Yarn
Tape
Marker

I painted one hand, stamped it on the poster board the number of "cards" I needed, then after a rinse at the sink, did the same with the other hand. Tips ~ have him / her spread their fingers a little, put their hand straight down, hold it in place as you press down each finger and the palm, paying special attention to the center of the palm, and pick hand straight up.

The poster board then moved to another room to dry on a flat surface while my son continued to finger paint for a little bit freestyle. After the hand prints dried, I cut around them. Put the saying on the back of one hand, and had him write his name. Then I took the yarn and held it up to him, hand to hand, as he stood like a letter 'T' in front of me. I made sure I had a little overlap to tape the yarn to the bottom of the hand. Cut, and used that piece to measure out the rest of the lengths of yarn that I needed. And wahlah! A hug to send to grandparents for Valentine's!


February 2014 Stamp of the Month

 How absolutely adorable is this stamp set???  This is a MUST HAVE.

This set can be yours for the month of February ONLY.  It is $17.95 on it's own, or only $5 with an order of $50 or more.  Order here now!